
worcester comfort 2 rf thermostat instructions pdf
The Worcester Comfort II RF Thermostat is a programmable room thermostat offering advanced heating control via RF technology. It ensures energy efficiency and user convenience, with comprehensive installation and operating instructions available in the PDF guide.
1.1 Overview of the Worcester Comfort II RF Thermostat
The Worcester Comfort II RF Thermostat is a user-friendly, wireless programmable room thermostat designed to optimize heating control. It utilizes radio frequency (RF) technology to communicate with the boiler, ensuring seamless operation. Compatible with Worcester boilers, this thermostat is ideal for modern heating systems, offering precise temperature control and energy efficiency. The instructions PDF provides a comprehensive guide for installers and users, covering installation, programming, and troubleshooting. It ensures proper setup and operation, helping users achieve comfort while reducing energy consumption. This thermostat is a reliable choice for managing heating systems efficiently.
1.2 Importance of the Worcester Comfort 2 RF Thermostat Instructions PDF
The Worcester Comfort 2 RF Thermostat Instructions PDF is essential for proper installation, configuration, and operation of the device. It provides detailed guidance for installers and users, ensuring compliance with safety standards and optimal performance. The PDF includes troubleshooting tips, energy-saving strategies, and maintenance advice, helping users maximize efficiency and comfort. By following the instructions, users can avoid common mistakes, ensure system compatibility, and maintain warranty validity. This comprehensive guide is indispensable for anyone aiming to harness the full potential of the Worcester Comfort II RF Thermostat effectively and safely.

Key Features of the Worcester Comfort II RF Thermostat
The Worcester Comfort II RF Thermostat offers programmable room controls, RF wireless communication, twin channel operation, and advanced energy-saving features for optimal heating management and comfort.
2.1 Programmable Room Thermostat Functionality
The Worcester Comfort II RF Thermostat allows users to set custom heating and hot water schedules, ensuring precise temperature control throughout the day. With its programmable functionality, homeowners can create tailored profiles to suit their lifestyle, optimizing energy usage and comfort. The thermostat supports up to six heating periods daily, enabling flexible and efficient temperature management. Its intuitive interface makes it easy to adjust settings, while the RF technology ensures reliable communication with the boiler or receiver. This feature-rich design helps reduce energy waste and enhances overall system performance, making it a practical solution for modern heating needs.
2.2 Radio Frequency (RF) Technology
The Worcester Comfort II RF Thermostat utilizes advanced Radio Frequency (RF) technology to ensure seamless communication between the thermostat and the receiver. This wireless connection eliminates the need for complex wiring, simplifying installation and reducing potential errors. The RF signal operates at a frequency of 868 MHz, providing reliable transmission over distances of up to 30 meters indoors. This technology minimizes interference from other devices, ensuring consistent and accurate communication. The RF feature also enhances energy efficiency by enabling precise control over the heating system, making it a key component of the thermostat’s functionality and performance.
2.3 Twin Channel Operation
The Worcester Comfort II RF Thermostat features Twin Channel Operation, enabling independent control of heating and hot water systems. This functionality allows users to set different schedules and temperatures for space heating and domestic hot water, optimizing comfort and energy efficiency. The thermostat can simultaneously manage both channels, ensuring precise control over each system. Twin Channel Operation is particularly useful in homes with separate heating and hot water demands, offering flexibility and customization. This feature enhances user convenience while maintaining energy-saving capabilities, making it a standout attribute of the Worcester Comfort II RF Thermostat.
2.4 Energy Efficiency and Comfort Features
The Worcester Comfort II RF Thermostat is designed with advanced energy efficiency and comfort features. It includes an energy-saving mode that optimizes heating usage while maintaining desired temperatures. The thermostat also features an eco-mode, which reduces energy consumption during periods of inactivity. Additionally, it offers smart scheduling options to tailor heating and hot water usage to your daily routine; The thermostat’s ability to modulate boiler output ensures minimal energy waste, leading to lower energy bills and reduced environmental impact. These features make it an ideal choice for homeowners seeking both comfort and sustainability.

Installation and Commissioning
The Worcester Comfort II RF Thermostat installation is straightforward, requiring a qualified professional to ensure proper setup. Commissioning involves connecting the receiver, configuring settings, and testing functionality to ensure optimal performance.
3.1 Pre-Installation Checks
Before installing the Worcester Comfort II RF Thermostat, ensure the system is compatible with your boiler and heating setup. Check the existing wiring for damage or faults and verify that the power supply meets the thermostat’s requirements. Confirm that the receiver is compatible with your boiler’s control system. Ensure the location for the thermostat is centrally positioned to provide accurate temperature readings. Review the instructions for any specific tools or materials needed. Lastly, check that all components, including the receiver and batteries, are included in the packaging. Proper preparation ensures a smooth installation process.
3.2 Wall Mounting Instructions
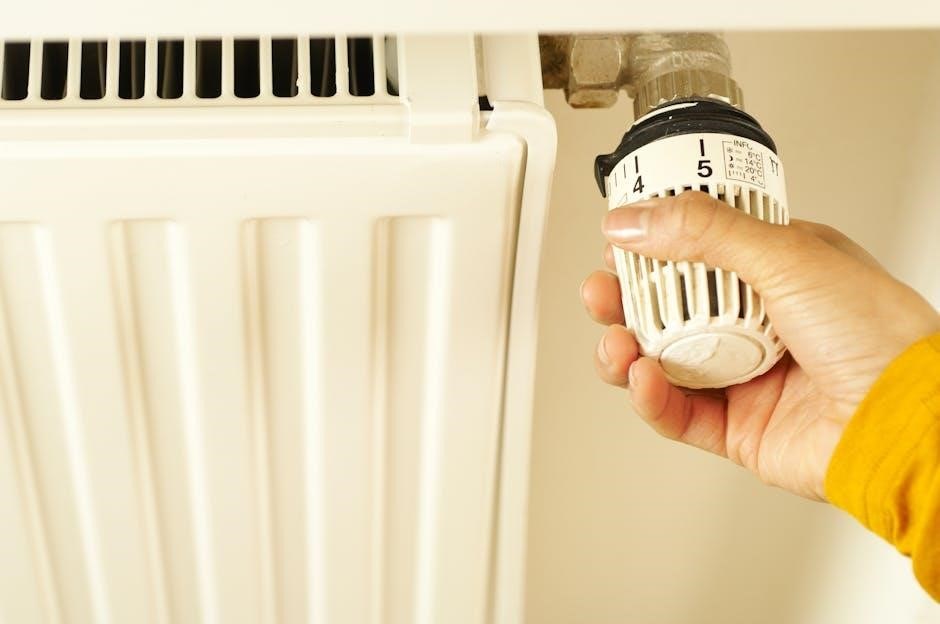
To wall mount the Worcester Comfort II RF Thermostat, begin by locating a suitable position, ensuring it is level and free from obstructions. Use a spirit level to mark the wall for accurate installation. Drill pilot holes for the wall studs or anchors provided. Secure the mounting bracket firmly to the wall, ensuring it is straight. Attach the thermostat to the bracket by aligning the clips and gently snapping it into place. Connect the receiver unit to the boiler following the wiring diagram in the instructions. Finally, test the thermostat to ensure proper operation and level placement for accurate temperature readings.
3.3 EMS Connection Setup
The EMS (Energy Management System) connection setup ensures communication between the Worcester Comfort II RF Thermostat and the boiler. Begin by connecting the receiver unit to the boiler’s control circuit, following the wiring diagram in the instructions. Ensure the power supply to the boiler is switched off before making any connections. Connect the EMS terminals to the appropriate points on the boiler’s control board. Once connected, restore the power and test the system to ensure proper communication. If the system does not respond, check the connections and consult the troubleshooting guide for assistance. Proper EMS setup is crucial for optimal system performance.
3.4 Initial System Configuration
After completing the EMS connection, power on the system and access the installer menu. Set the time and date using the touchscreen interface. Configure the heating and hot water circuits according to your preferences. Ensure the temperature range is set between 0°C and 30°C for heating and 35°C and 65°C for hot water. Verify that the system recognizes the EMS module and all components are functioning correctly. Save the configuration to apply the settings. Perform a system test to ensure proper operation of heating, hot water, and timing functions. This initial setup ensures the thermostat operates efficiently and meets your comfort needs.

Operating the Worcester Comfort II RF Thermostat
Operating the Worcester Comfort II RF Thermostat is straightforward, offering an intuitive interface for controlling heating and hot water. Navigate through menus to set schedules, adjust temperatures, and optimize energy use efficiently.
4.1 Understanding the User Interface
The Worcester Comfort II RF Thermostat features an intuitive user interface designed for ease of use. The LCD display provides clear visibility of temperatures, timers, and system status. Navigate through menus using the buttons located below the screen. The interface allows you to view and adjust heating and hot water schedules, set temperatures, and access advanced settings. Visual feedback ensures you understand each function, with icons and text guiding you through operations. This user-friendly design makes it simple to manage your home’s comfort and energy efficiency effectively.
Regular use becomes second nature due to its logical layout.
4.2 Setting Up Heating and Hot Water Programs
The Worcester Comfort II RF Thermostat allows you to create customized schedules for heating and hot water. Set temperature levels and timings to suit your daily routine, ensuring comfort and energy efficiency. Use the interface to program up to six heating periods and separate hot water timings. Optimize your settings by adjusting start and end times, as well as desired temperatures; This feature ensures your system runs efficiently, only using energy when needed. Regularly review and update your programs to maintain optimal performance and adapt to changing household needs.
Customization is key to maximizing comfort and energy savings.
4.3 Adjusting Temperature and Timer Settings
The Worcester Comfort II RF Thermostat allows precise control over temperature and timer settings. Use the interface to adjust heating and hot water temperatures separately, ensuring optimal comfort. Set specific times for when the system should activate or deactivate, aligning with your daily schedule. The thermostat enables customizable temperature ranges (e.g., 0-30°C) and timer intervals for both heating and hot water. For energy efficiency, lower temperatures can be set for periods when the property is unoccupied. Regularly reviewing and updating these settings helps maintain comfort and reduces energy consumption.
Adjustments are straightforward and user-friendly.
4.4 Navigating the Installer Menu
The Installer Menu on the Worcester Comfort II RF Thermostat provides advanced settings for system configuration. Access the menu by pressing and holding the button marked with a wrench icon. Enter the installer PIN to proceed. Within the menu, adjust parameters such as boiler temperature limits, system modulation, and pump control. Navigate using the arrow keys to scroll through options and use the confirm button to save changes. The menu also allows resetting to factory defaults for troubleshooting. Always refer to the Worcester Comfort 2 RF Thermostat Instructions PDF for detailed guidance on using the Installer Menu effectively.

Pairing and Unpairing the Thermostat
Pairing ensures communication between the Worcester Comfort II RF Thermostat and receiver. Unpairing resets connections. Follow the Worcester Comfort 2 RF Thermostat Instructions PDF for detailed steps.
5.1 Pairing the Thermostat and Receiver
Pairing the Worcester Comfort II RF Thermostat with its receiver ensures seamless communication. Start by ensuring both devices are compatible and within range. Open the battery compartment on the thermostat and locate the pairing button. Press and hold it until the LED flashes. Simultaneously, press the pairing button on the receiver, typically found at the back or bottom. The LED will stop flashing once paired. Confirm pairing by checking the thermostat’s display or following the Worcester Comfort 2 RF Thermostat Instructions PDF. If issues arise, restart both devices and repeat the process.
5.2 Unpairing the Thermostat and Receiver
To unpair the Worcester Comfort II RF Thermostat from its receiver, follow these steps. First, ensure the thermostat is powered on. Locate the pairing button, usually found in the battery compartment or on the rear of the device. Press and hold it until the LED begins to flash rapidly; Next, access the receiver and press its pairing button, often located on the back or bottom. Hold it until the LED on the thermostat stops flashing, indicating the connection has been severed. This process does not reset thermostat settings but disconnects communication between devices. Refer to the Worcester Comfort 2 RF Thermostat Instructions PDF for detailed guidance.
5.3 Troubleshooting Pairing Issues
If pairing issues arise with the Worcester Comfort II RF Thermostat, start by ensuring both the thermostat and receiver are powered on. Check for physical obstructions between the devices, as walls or furniture can block RF signals. Restart both units by turning them off and on again. Verify that the thermostat and receiver are within the recommended range, typically up to 30 meters indoors. If issues persist, consult the Worcester Comfort 2 RF Thermostat Instructions PDF for reset procedures or firmware updates. Ensure no other wireless devices are interfering on the same frequency. If problems remain unresolved, contact Worcester customer support for assistance.

Maintenance and Upkeep
Regular maintenance ensures optimal performance. Clean the thermostat screen gently with a soft cloth and avoid harsh chemicals. Replace batteries annually or as indicated. Check for software updates to keep the system running smoothly and efficiently.
6.1 Cleaning the Thermostat
Cleaning the Worcester Comfort II RF Thermostat is essential for maintaining optimal performance and accuracy. Use a soft, dry cloth to gently wipe the thermostat’s exterior, removing dust or debris. For stubborn marks, dampen the cloth slightly with water, but avoid excessive moisture. Never use harsh chemicals or abrasive cleaners, as they may damage the screen or casing. Clean the LCD display carefully to ensure visibility. Regular cleaning every 2-3 months prevents dust buildup and ensures reliable temperature sensing. After cleaning, allow the thermostat to dry completely before restoring power or replacing the cover, if applicable.
6.2 Replacing Batteries
The Worcester Comfort II RF Thermostat operates on two AA alkaline batteries, ensuring reliable performance. Regularly check the battery level indicator on the display. When batteries are low, replace them promptly to avoid system interruptions. To replace, slide the thermostat off its wall plate and remove the battery compartment. Insert fresh batteries, ensuring correct polarity. Avoid mixing old and new batteries. After replacement, reattach the thermostat and test functionality. Proper disposal of used batteries is essential for environmental safety. Always use high-quality batteries to maintain optimal performance and longevity of the device.
6.3 Software Updates and Firmware Checks
Regular software updates and firmware checks are essential for ensuring the Worcester Comfort II RF Thermostat operates at its best. To check for updates, navigate to the settings menu and select the “Software Update” option. The thermostat will automatically search for available updates and prompt you to download and install them if necessary. Ensure the thermostat is connected to a stable power supply during the update process. Firmware checks can be performed similarly to verify that your device is running the latest version. These updates often improve functionality, security, and compatibility, so it’s important to perform them regularly to maintain optimal performance.

Advanced Settings and Customization
Explore advanced customization options for the Worcester Comfort II RF Thermostat, including custom heating programs, sensor adjustments, and system integration for enhanced efficiency and control.
7.1 Setting Up to Six Heating Control Timings
The Worcester Comfort II RF Thermostat allows users to set up to six heating control timings, providing precise control over their heating schedule. This feature is ideal for optimizing energy usage and ensuring comfort throughout the day. To configure the timings, navigate to the advanced settings menu via the user interface. Select the desired number of timings and set the start and end times, along with the preferred temperatures. The thermostat will then activate the boiler accordingly, ensuring efficient operation. This functionality is particularly useful for households with varying daily routines, as it allows for tailored heating profiles.
7.2 Configuring Hot Water Timings
Configuring hot water timings on the Worcester Comfort II RF Thermostat allows for precise control over your water heating schedule. To set up hot water timings, navigate to the advanced settings menu and select the hot water configuration option. Choose the desired days for hot water operation and set the start and end times using the +/- buttons. Ensure the times align with your household’s needs for optimal energy efficiency. After configuring, save the settings to apply the changes. Regularly review and adjust the schedule to maintain comfort and energy savings. This feature ensures hot water is available only when needed, reducing unnecessary energy consumption.
7.3 Adjusting Sensor Caliber and Sensitivity
To optimize performance, the Worcester Comfort II RF Thermostat allows users to fine-tune sensor calibration and sensitivity. Access the Installer Menu by holding the ‘OK’ button for 5 seconds and entering the default password (1234). Navigate to ‘Sensor Settings’ and select ‘Calibration.’ Follow on-screen instructions to let the thermostat learn your room’s conditions. For accuracy, adjust the temperature offset if needed. Sensitivity settings control how the system responds to temperature changes; increasing sensitivity enhances responsiveness but may cause more frequent cycling. Refer to the Worcester Comfort 2 RF Thermostat Instructions PDF for detailed guidance to ensure precise control and efficiency.

Safety Instructions and Precautions
Adhere to all safety guidelines to ensure safe operation. Avoid exposing the thermostat to water, extreme temperatures, or chemicals. Never tamper with internal components or install it improperly.
8.1 General Safety Guidelines
When working with the Worcester Comfort II RF Thermostat, always follow safety guidelines to ensure safe installation and operation. Avoid exposing the thermostat to water or extreme temperatures, as this can damage the device. Never touch electrical components without disconnecting the power supply. Keep the thermostat out of reach of children to prevent accidental tampering. Ensure proper installation by a qualified professional to avoid system malfunctions. Regularly inspect the device for signs of wear or damage. Always turn off the power before performing any maintenance or repairs. Properly dispose of old or faulty units to minimize environmental impact.
8.2 Explanation of Symbols and Warnings
The Worcester Comfort II RF Thermostat instructions PDF includes essential symbols and warnings to guide safe and proper use. These symbols are displayed on the thermostat or in the manual to alert users to potential risks. Common symbols include warning (triangles with exclamation marks), caution (exclamation points), and information icons. Each symbol is accompanied by a description to ensure users understand their meaning. Warnings highlight risks like high temperatures or electrical hazards, while informational icons provide operational guidance. Ignoring these symbols may lead to system damage or personal injury. Always refer to the manual for detailed explanations.
8.3 Emergency Shutdown Procedures
In case of an emergency, such as a system malfunction or extreme temperature fluctuations, follow these steps:
Immediately switch off the power supply to the boiler and thermostat using the main electrical switch.
Turn off the boiler at its dedicated isolator switch.
Press and hold the thermostat’s emergency shutdown button (if equipped) until the system powers down.
Ensure all heating and hot water systems are turned off.
Contact a qualified technician to assess and resolve the issue before restarting. Always prioritize safety and avoid restart without professional verification.
Troubleshooting Common Issues
Troubleshooting the Worcester Comfort II RF Thermostat involves identifying issues like loss of RF signal, temperature inaccuracies, or firmware glitches. Check receiver placement, signal strength, and battery levels. Resetting the system or updating firmware often resolves connectivity and operational problems. Refer to the Worcester Comfort 2 RF Thermostat Instructions PDF for detailed diagnostic steps and solutions to ensure optimal performance and reliability.
9.1 Identifying Fault Codes
The Worcester Comfort II RF Thermostat displays fault codes to indicate specific issues. These codes, such as “E1” or “E2,” help diagnose problems like sensor faults or communication errors. To identify the code, check the thermostat’s display or refer to the Worcester Comfort 2 RF Thermostat Instructions PDF. Each code corresponds to a detailed explanation in the manual, guiding you to resolve the issue. For example, an “E5” code may indicate a wiring problem. Understanding these codes is essential for quick troubleshooting and maintaining optimal system performance. Always consult the manual for accurate interpretations and solutions.
9.2 Resolving Communication Errors
Communication errors between the Worcester Comfort II RF Thermostat and its receiver can occur due to interference, incorrect pairing, or physical obstructions. To resolve this, first, ensure the thermostat and receiver are properly paired. Restart the system by turning it off and on again. Check the RF signal strength by moving the thermostat closer to the receiver. Verify that no physical obstructions, such as walls or furniture, are blocking the signal. If issues persist, consult the Worcester Comfort 2 RF Thermostat Instructions PDF for advanced troubleshooting steps or reset the system to factory settings.
9.3 Addressing Temperature Inaccuracy
If the Worcester Comfort II RF Thermostat displays incorrect temperature readings, ensure it is installed away from direct sunlight, drafts, or radiators. Check for sensor calibration by navigating to the installer menu and selecting “Sensor Calibration.” Clean the sensor gently with a soft cloth to remove dirt or debris. If issues persist, verify that the system is balanced and the boiler is functioning correctly. Resetting the thermostat by removing the batteries for 10 seconds may also resolve the problem. If inaccuracies continue, consult a qualified technician to assess the system.

Compliance and Regulations
The Worcester Comfort II RF Thermostat adheres to strict energy efficiency standards, ensuring compliance with building regulations and environmental guidelines for optimal performance and eco-friendly operation.
It meets ErP Directive requirements, promoting sustainable heating solutions while maintaining regulatory conformity.
10.1 Energy Efficiency Standards
The Worcester Comfort II RF Thermostat is designed to meet stringent energy efficiency standards, ensuring optimal performance while minimizing energy consumption. It complies with EU Ecodesign Directive requirements and ErP (Energy-related Products) regulations, which aim to reduce environmental impact. The thermostat’s programmable functionality and RF technology enable precise temperature control, reducing energy waste. By adhering to these standards, the thermostat helps users achieve significant energy savings and lower carbon emissions. Its energy-efficient design aligns with modern building regulations, making it a sustainable choice for heating systems. Users can rely on its compliance with energy efficiency standards for eco-friendly operation.
10.2 Compliance with Building Regulations
The Worcester Comfort II RF Thermostat is designed to meet all relevant building regulations, ensuring safe and efficient operation. Proper installation by a qualified professional is essential to comply with legal standards. The thermostat supports energy-efficient heating systems, aligning with current building codes. It is compatible with modern boilers and heat pumps, meeting requirements for energy performance. Users must follow installation guidelines to maintain compliance. Regular maintenance, as outlined in the instructions, ensures ongoing adherence to regulations. Always consult local building codes and the Worcester Comfort 2 RF Thermostat Instructions PDF for specific requirements.
10.3 Environmental Considerations
The Worcester Comfort II RF Thermostat is designed with environmental sustainability in mind. Its energy-efficient operation helps reduce energy consumption, contributing to lower carbon emissions. The thermostat complies with EU regulations, such as the Eco-design Directive (Lot 20), ensuring it meets strict environmental standards. Additionally, the device is constructed from recyclable materials, promoting eco-friendly disposal. Proper recycling of batteries and components is encouraged to minimize environmental impact. By optimizing heating and hot water systems, this thermostat supports responsible energy use, aligning with global sustainability goals. Regular maintenance and updates ensure optimal performance while maintaining environmental integrity.
The Worcester Comfort II RF Thermostat offers enhanced energy efficiency and user-friendly control, making it a reliable choice for modern heating systems. Always refer to the Worcester Comfort 2 RF Thermostat Instructions PDF for optimal setup and maintenance. Regular updates and proper care ensure long-term performance and comfort.
11.1 Summary of Key Points
The Worcester Comfort II RF Thermostat is a highly efficient and user-friendly heating control system designed to optimize home comfort and energy savings. It features programmable functionality, RF technology, and twin channel operation for precise temperature management. Proper installation, configuration, and maintenance are essential for optimal performance. The thermostat’s advanced settings allow customization of heating and hot water timings, while safety features ensure reliable operation. Regular updates and troubleshooting guidance in the PDF instructions help users address common issues. By following the guidelines, users can enjoy a comfortable living environment while minimizing energy consumption and adhering to safety standards.
11.2 Final Tips for Optimal Performance
For the best experience with your Worcester Comfort II RF Thermostat, ensure regular maintenance, such as cleaning the device and replacing batteries when needed. Schedule annual system checks to maintain efficiency and performance. Utilize advanced features like RF pairing and adaptive learning to optimize heating schedules. Keep the thermostat away from direct sunlight and drafts for accurate temperature readings. Always refer to the Worcester Comfort 2 RF Thermostat Instructions PDF for troubleshooting and updates. By following these tips, you can maximize energy savings and enjoy consistent comfort in your home.