
honeywell pro 8000 installation guide
Honeywell Pro 8000 Installation Guide: A Comprehensive Plan
This guide details the installation of the Honeywell Pro 8000 thermostat‚ covering everything from initial setup to advanced features‚ ensuring a smooth and efficient process.
Referencing manuals like the VisionPRO TH8000 series documentation‚ this plan provides a step-by-step approach for both professionals and DIY enthusiasts.
Carefully follow instructions to avoid damage‚ especially regarding the touchscreen‚ and be aware of potential Perchlorate material within the Lithium battery.
The Honeywell Pro 8000 is a sophisticated‚ touchscreen programmable thermostat designed for optimal home comfort and energy efficiency. Building upon the legacy of models like the VisionPRO TH8000 series‚ it offers advanced features and intuitive control.
This thermostat isn’t just about setting temperatures; it’s about creating a personalized climate experience. It allows for precise scheduling‚ remote access via Wi-Fi‚ and compatibility with various heating and cooling systems.
Understanding its capabilities is crucial for a successful installation. This guide will walk you through each step‚ referencing resources like the Honeywell VisionPRO 8000 Install Manual (69-1706) to ensure a seamless setup. Remember to handle the device with care‚ avoiding sharp objects on the touchscreen‚ as highlighted in the operating manual.
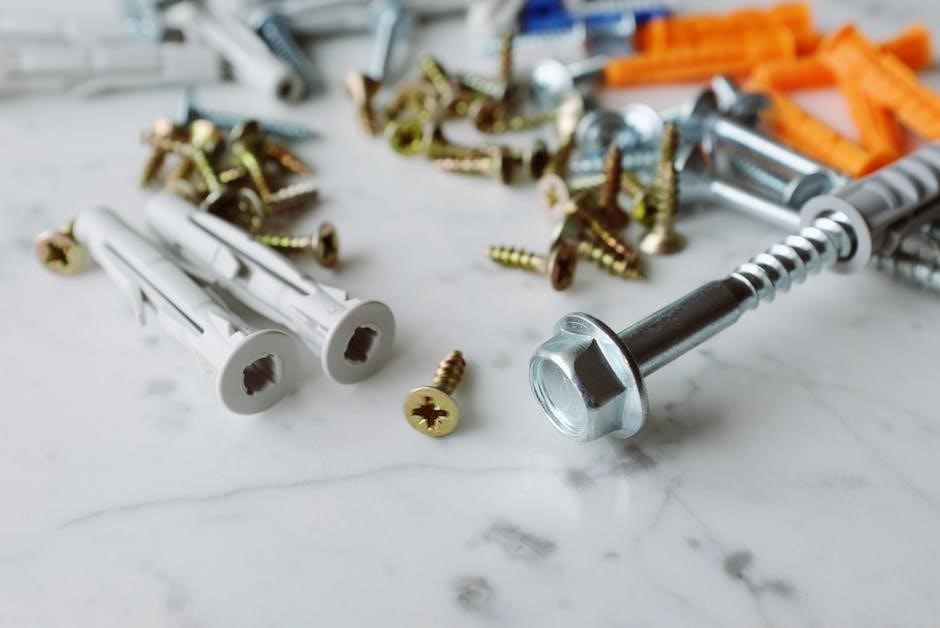
Package Contents & Verification
Upon opening your Honeywell Pro 8000 package‚ carefully verify all components are present. Typically‚ you should find the thermostat unit itself‚ a mounting base plate‚ screws and wall anchors for installation‚ wire labels for organization‚ and this comprehensive installation guide.
Confirm the presence of a Lithium battery‚ noting the potential for Perchlorate material as outlined in the operating manual. Inspect each item for any signs of damage incurred during shipping.
A missing component or damaged part can delay the installation process. If discrepancies exist‚ immediately contact Honeywell support resources – details are available in the warranty information. Accurate verification ensures a smooth and trouble-free setup‚ aligning with the detailed instructions found in manuals like the VisionPRO TH8000 series documentation.
Safety Precautions
Prior to commencing installation‚ disconnect power to your heating and cooling system at the breaker box. This crucial step prevents electrical shock and ensures a safe working environment. Never use sharp objects – pencils or pens – to interact with the touchscreen‚ as this can cause damage‚ as highlighted in the VisionPRO TH8000 operating manual.
Exercise caution when handling the Lithium battery‚ recognizing it may contain Perchlorate material requiring special handling. Avoid touching exposed wiring and always adhere to local electrical codes.
If you are uncomfortable with electrical work‚ consult a qualified HVAC professional. Improper installation can lead to system malfunction or safety hazards. Prioritize safety throughout the entire process‚ referencing the installation manual (69-1706) for detailed guidance.
Tools Required for Installation
For a successful Honeywell Pro 8000 installation‚ gather the following tools: a Phillips head screwdriver (essential for mounting and wiring)‚ a flathead screwdriver (useful for certain terminal connections)‚ and wire strippers (to prepare wires for secure connections). A voltage tester is critical for verifying power is off before working with wiring.
A level ensures the thermostat is mounted straight‚ improving aesthetics and functionality. Pliers can assist with wire manipulation‚ and a small flashlight illuminates dimly lit wiring areas.
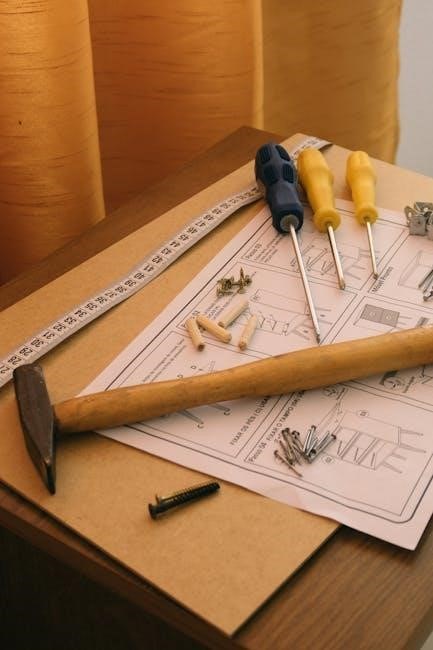
Consider a digital multimeter for advanced troubleshooting. Having the installation manual (69-1706) readily available is also a vital “tool” for reference throughout the process. Ensure all tools are in good working order before beginning.
System Compatibility Check
Before installing the Honeywell Pro 8000‚ verify your existing HVAC system’s compatibility. This thermostat supports various heating and cooling systems‚ but confirmation is crucial.
Check for a common (C-wire)‚ often required for consistent power. Without it‚ an adapter may be necessary. The Pro 8000 works with conventional heating (gas‚ oil‚ electric) and cooling systems.
Heat pump compatibility requires careful assessment; ensure your heat pump’s control board supports the thermostat’s wiring configuration. Review the VisionPRO TH8000 series documentation for detailed compatibility charts. Incorrect wiring can damage your system‚ so proceed cautiously and consult a professional if unsure.
Heating System Compatibility
The Honeywell Pro 8000 is generally compatible with most 24V heating systems‚ including gas‚ oil‚ and electric furnaces. However‚ specific wiring configurations vary.
For conventional systems‚ ensure the thermostat wiring matches the existing setup‚ paying close attention to the heat call wire (typically W). Millivolt systems require a different approach and may not be directly compatible without an adapter.
Always consult the VisionPRO TH8000 series installation manual for detailed wiring diagrams specific to your heating system type. Incorrect wiring can lead to system malfunction or damage. If you are unsure‚ it’s best to consult a qualified HVAC technician.
Cooling System Compatibility
The Honeywell Pro 8000 thermostat supports most standard 24V cooling systems‚ including central air conditioners and heat pump cooling modes. Proper wiring is crucial for correct operation.
Typically‚ the cooling wire (Y) connects to the designated terminal on the thermostat baseplate. For systems with multiple stages of cooling‚ additional wiring may be required to connect the second-stage cooling wire (Y2).
Refer to the VisionPRO TH8000 series installation manual for specific wiring diagrams based on your cooling system configuration. Ensure the common wire (C-wire) is properly connected for reliable power. Incorrect wiring can prevent the cooling system from functioning correctly.
Heat Pump Compatibility
The Honeywell Pro 8000 is designed to work with various heat pump systems‚ including those with auxiliary heat. Heat pump wiring differs from conventional systems‚ requiring careful attention to terminal designations.
Typically‚ heat pump systems utilize wires for heating (O/B)‚ cooling (Y)‚ and reversing valve control (G). The O/B wire’s function depends on the heat pump type – ‘O’ for cooling on energize‚ ‘B’ for heating on energize.
Consult the VisionPRO TH8000 series manual for detailed wiring diagrams specific to your heat pump configuration. Proper identification of the O/B wire is critical. A common wire (C-wire) is essential for reliable operation. Incorrect wiring can lead to improper heating or cooling.
Wiring Diagram Overview
Understanding the wiring diagram is crucial for a successful Honeywell Pro 8000 installation. The diagram illustrates the connections between the thermostat and your HVAC system’s control board. Carefully review the diagram before beginning any wiring‚ referencing the VisionPRO TH8000 series installation manual.
Key terminals include R (power)‚ C (common)‚ Y (cooling)‚ G (fan)‚ W (heating)‚ and O/B (reversing valve). Identifying these terminals correctly is paramount. Pay close attention to wire colors‚ as they can vary.
The Pro 8000 often requires a C-wire for consistent power. Incorrect wiring can damage the thermostat or HVAC system‚ so double-check all connections before powering on.
Identifying Terminal Designations
Accurate identification of terminal designations is vital for proper Honeywell Pro 8000 operation. The ‘R’ terminal typically supplies 24VAC power‚ while ‘C’ serves as the common wire‚ completing the circuit. ‘Y’ activates the cooling system‚ and ‘G’ controls the fan.
‘W’ energizes the heating system‚ and ‘O/B’ manages the reversing valve in heat pump configurations. Refer to your HVAC system’s wiring diagram to confirm these designations.
The VisionPRO TH8000 manual provides detailed illustrations. Misidentifying terminals can lead to system malfunction or damage. Double-check each connection against both the thermostat and HVAC system documentation before proceeding.
Common Wire (C-Wire) Requirement
The Honeywell Pro 8000 typically requires a ‘C-Wire’ (Common Wire) for consistent power. This wire provides a return path for the 24VAC power‚ essential for reliable operation of the thermostat’s touchscreen and Wi-Fi connectivity.
Older systems may lack a C-Wire‚ requiring an adapter or professional installation to add one. Without a C-Wire‚ the thermostat may exhibit issues like a blank screen‚ erratic behavior‚ or inability to connect to Wi-Fi.
Consult the VisionPRO TH8000 documentation for C-Wire adapter options. Proper C-Wire connection is crucial for unlocking the full functionality of your Pro 8000 thermostat.
Thermostat Mounting & Base Plate Installation
Begin by carefully removing your old thermostat‚ labeling each wire before disconnecting it. The Honeywell Pro 8000 utilizes a base plate for mounting‚ ensuring a secure and level installation. Attach the base plate to the wall using the provided screws‚ ensuring it’s free from obstructions.
Use a level to confirm proper alignment before fully tightening the screws. The base plate provides connection points for the thermostat’s wiring. Ensure the wires are neatly arranged and have sufficient slack for easy connection.
Once the base plate is securely mounted‚ you can proceed with wiring the thermostat‚ referencing the wiring diagram.
Wiring the Thermostat
Carefully connect the labeled wires to the corresponding terminals on the thermostat’s base plate. Refer to the wiring diagram for accurate connections‚ ensuring each wire is securely fastened. Heating wires typically connect to terminals labeled ‘W’ or ‘W1’‚ while cooling wires connect to ‘Y’ or ‘Y1’.
The ‘G’ terminal is for the fan wire‚ controlling the blower motor. A common wire (C-wire) is often required for consistent power‚ especially with newer models. Double-check all connections before proceeding‚ ensuring no bare wires are exposed.
Securely attach the thermostat to the base plate once all wiring is complete‚ verifying a snug fit.
Connecting Heating Wires
Identify the heating wires‚ typically labeled ‘W’ or ‘W1’ from your existing thermostat. These wires provide power to your heating system‚ whether it’s gas‚ electric‚ or oil. Carefully connect the ‘W’ wire to the designated ‘W’ terminal on the Honeywell Pro 8000’s base plate‚ ensuring a secure connection.
If you have a heat pump‚ you may have additional heating wires like ‘W2’ for auxiliary heat. Connect these wires to their corresponding terminals as indicated in the wiring diagram. Double-check the wiring diagram to confirm correct placement‚ avoiding potential system malfunctions.
Ensure wires are firmly seated in the terminals before proceeding to the next step.
Connecting Cooling Wires
Locate the cooling wires‚ generally labeled ‘Y’ or ‘Y1’ from your previous thermostat setup. These wires deliver power to your air conditioning system‚ enabling cooling functionality. Securely connect the ‘Y’ wire to the designated ‘Y’ terminal on the Honeywell Pro 8000 base plate‚ ensuring a firm and reliable connection.
For heat pump systems‚ you might encounter a ‘Y2’ wire for second-stage cooling. Connect this wire to its corresponding terminal‚ referencing the wiring diagram for accurate placement. Always verify the wiring diagram to prevent incorrect connections and potential system damage.
Confirm all wires are securely fastened within their respective terminals before moving forward.
Connecting Fan Wires
Identify the fan wire‚ typically labeled ‘G’ from your existing thermostat configuration. This wire controls the blower fan‚ circulating air throughout your home. Carefully connect the ‘G’ wire to the designated ‘G’ terminal on the Honeywell Pro 8000 base plate‚ ensuring a secure and stable connection.
Some systems may have multiple fan wires for different fan speeds or modes. Refer to your system’s wiring diagram to correctly identify and connect each fan wire to its corresponding terminal. Incorrect wiring can lead to improper fan operation or system malfunction.
Double-check all connections to guarantee they are firmly in place before proceeding with the installation process.
Powering On & Initial Setup
After wiring is complete and verified‚ restore power to your HVAC system at the breaker. The Honeywell Pro 8000’s touchscreen should illuminate‚ initiating the startup sequence. Follow the on-screen prompts to begin the initial setup process. This typically involves selecting your language‚ date format‚ and system type – heating‚ cooling‚ or heat pump.
The thermostat will guide you through a series of questions to configure basic settings tailored to your home’s specific setup. Pay close attention to each prompt‚ ensuring accurate responses for optimal performance. Avoid using sharp objects like pens to interact with the touchscreen; use your fingertip only.
This initial setup is crucial for proper operation.
Wi-Fi Connection & Network Setup
To unlock smart features‚ connect your Honeywell Pro 8000 to your home’s Wi-Fi network. From the thermostat’s touchscreen‚ navigate to the network settings menu. The system will scan for available networks; select yours from the list. Enter your Wi-Fi password carefully‚ ensuring correct capitalization and characters.
A successful connection is indicated by a Wi-Fi symbol on the display. If the connection fails‚ double-check your password and network settings. Ensure your router is functioning correctly and within range of the thermostat. Refer to the VisionPRO documentation for troubleshooting tips.
Once connected‚ the thermostat can receive updates and remote control.
Programming Basic Settings
After initial setup‚ programming basic settings personalizes your Honeywell Pro 8000. Access the programming mode through the touchscreen menu. Start by selecting a program type – either a pre-set schedule or a custom one. Define wake‚ leave‚ return‚ and sleep periods for each day of the week.
Set desired temperatures for each period‚ optimizing comfort and energy savings. Utilize the thermostat’s intuitive interface to easily adjust settings. Review the programming at a glance to confirm accuracy‚ as outlined in the VisionPRO manual. Consider using different settings for weekdays and weekends.
Save your program to activate the customized schedule.
Setting Date and Time
Accurate date and time settings are crucial for proper scheduling with your Honeywell Pro 8000. Access the settings menu via the touchscreen interface. Navigate to the “Date/Time” option and select it. Use the up and down arrows to adjust the month‚ day‚ and year. Confirm each selection before proceeding.
Next‚ set the current time‚ adjusting the hour and minute. Ensure you select the correct AM or PM designation. The thermostat may offer a 24-hour clock option; choose your preference. Double-check the displayed date and time for accuracy.
Save the settings to finalize the date and time configuration.
Configuring Temperature Preferences
Personalizing temperature settings is key to maximizing comfort and energy savings with your Honeywell Pro 8000. Access the “Preferences” or “Settings” menu on the touchscreen. Locate the temperature scale option – choose between Fahrenheit (°F) and Celsius (°C). Set your desired heating and cooling setpoints for different time periods.
Explore features like “Smart Response” to optimize heating/cooling cycles. Consider utilizing scheduling options to automatically adjust temperatures based on your daily routine. Experiment with temperature hold durations to maintain comfort when needed.
Regularly review and adjust these preferences for optimal performance.
Understanding Touchscreen Functionality
The Honeywell Pro 8000 features an intuitive touchscreen interface for easy control. Navigation relies on gentle fingertip presses – avoid sharp objects like pens or pencils to prevent damage‚ as highlighted in the VisionPRO TH8000 manual. The main screen displays current temperature‚ setpoints‚ and operating mode;
Swipe gestures are used to navigate between menus and settings. Tap icons to select options or adjust values. Long presses may access advanced features or confirm selections. Familiarize yourself with the icons representing heating‚ cooling‚ fan‚ and system modes.
Explore the menu structure to discover all available settings and customization options.
Troubleshooting Common Installation Issues
If the thermostat doesn’t power on‚ verify the C-wire connection – a common issue. Double-check all wiring connections against the wiring diagram‚ ensuring secure and correct placement of each wire. If the display is blank‚ confirm battery installation and proper voltage supply.
Wi-Fi connection problems can often be resolved by restarting the thermostat and router. Incorrect temperature readings may indicate a calibration issue or sensor malfunction. Heating or cooling not responding could stem from incorrect system compatibility settings.
Consult the installation manual for specific error codes and troubleshooting steps.
Battery Installation & Maintenance
The Honeywell Pro 8000 utilizes a Lithium battery‚ potentially containing Perchlorate material‚ requiring careful handling and disposal according to regulations. Battery installation is crucial for maintaining settings during power outages and ensuring continued operation of the thermostat’s memory functions.
Typically‚ battery replacement is needed annually‚ though usage patterns can affect lifespan. Monitor for low battery warnings displayed on the touchscreen. Always use the specified battery type to avoid damage or malfunction.
Proper battery maintenance extends the thermostat’s reliability and prevents data loss. Refer to the user manual for detailed instructions on battery access and replacement procedures.
Advanced Features Overview
The Honeywell Pro 8000 boasts a suite of advanced features beyond basic temperature control‚ enhancing comfort and energy efficiency. Smart features include geofencing‚ automatically adjusting temperatures based on your location‚ and remote access via the Honeywell Home app.
Customizable scheduling allows for precise temperature control throughout the day‚ optimizing energy usage. Integration with other smart home devices is possible‚ creating a connected home ecosystem. Detailed energy reports provide insights into consumption patterns.
Explore features like humidity control and fan settings for personalized comfort. Regularly check for software updates to unlock new functionalities and improvements.
Resetting the Thermostat to Factory Defaults
Resetting your Honeywell Pro 8000 to factory defaults erases all personalized settings‚ returning it to its original state. This is useful for troubleshooting or preparing the thermostat for a new user. The process typically involves navigating through the thermostat’s menu system using the touchscreen.
Consult the user manual for the precise steps‚ as the menu structure may vary slightly depending on the software version. Be aware that resetting will delete your Wi-Fi connection‚ schedules‚ and temperature preferences.
Ensure you have your network credentials readily available if you plan to reconnect to Wi-Fi afterward. A factory reset doesn’t affect the physical wiring of the thermostat.
Warranty Information & Support Resources
Your Honeywell Pro 8000 thermostat is covered by a limited warranty‚ protecting against defects in materials and workmanship. The warranty period typically begins from the date of purchase‚ as evidenced by your receipt. Review the warranty documentation included with your thermostat for specific terms and conditions.
For assistance‚ Honeywell offers a range of support resources‚ including an online knowledge base‚ frequently asked questions‚ and troubleshooting guides. You can also contact Honeywell’s customer support team via phone or email. Their website provides access to downloadable manuals and software updates.
Keep your proof of purchase and warranty information in a safe place for future reference.